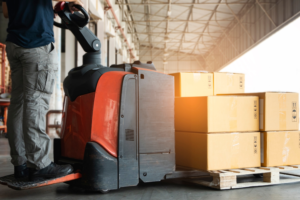
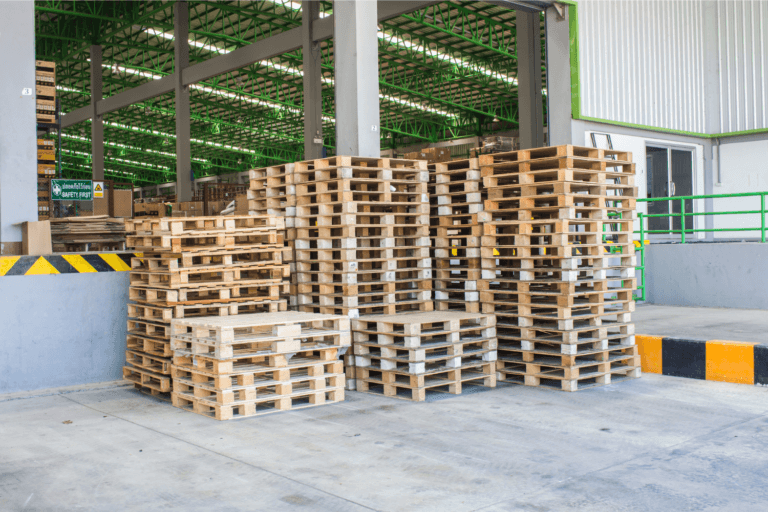
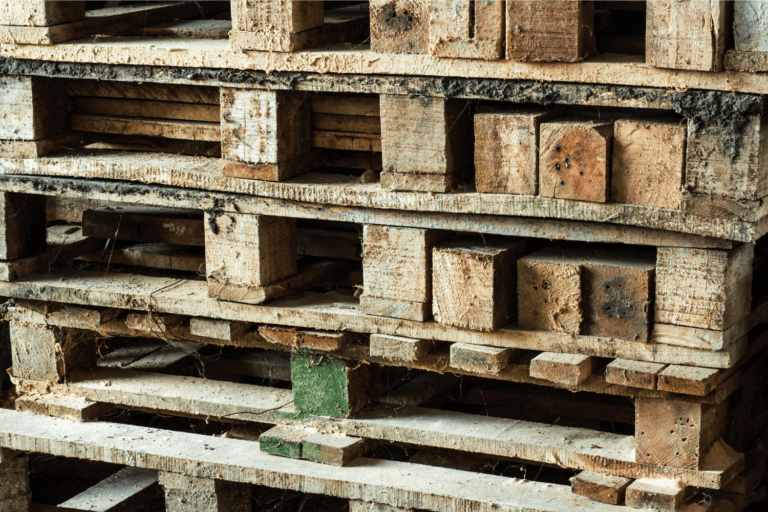
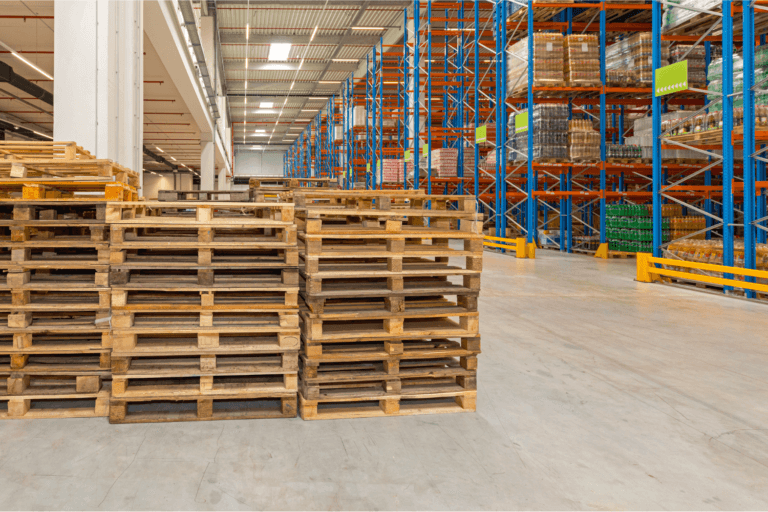
Wooden pallets are ubiquitous in shipping and logistics, and often, they are discarded after just one use. This leads to a significant amount of waste.
You can divert these pallets from landfills and help the environment by repurposing them. Below are the DIY pallet projects you can start.
37 DIY Pallet Projects If You Feel Creative
Pallets can be transformed into a wide range of items, including furniture, garden planters, storage solutions, and home decor.
The possibilities are nearly endless, limited only by one’s creativity and skill level. This versatility makes them an ideal material for DIY projects.
Furniture
Pallets provide a sturdy base and can be easily modified into tables, chairs, and sofas with a rustic, durable appeal.
1. Tables
You will need a few standard pallets, sandpaper, wood screws, a saw, and a finish of your choice like paint, stain, or sealer. Follow the steps below:
- Choose two or three pallets that are in good condition.
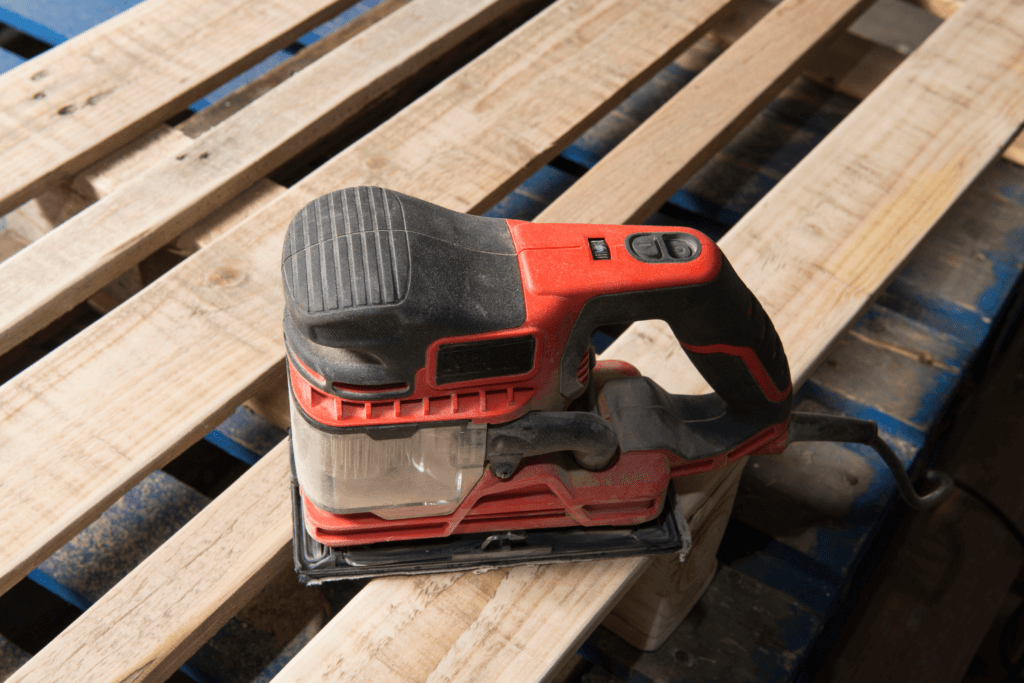
- If you want a more refined look, sand down the pallets to remove splinters and rough edges.
- Once prepared, stack the pallets to form the tabletop. You can leave them as-is for a rustic look or dismantle and reassemble them for a smoother surface.
- For stability, secure the pallets together using wood screws.
- For the legs, you can either repurpose additional pallets by cutting them into sturdy legs or use more traditional furniture legs that you can attach to the bottom of the tabletop. Ensure everything is level and stable, making adjustments as necessary.
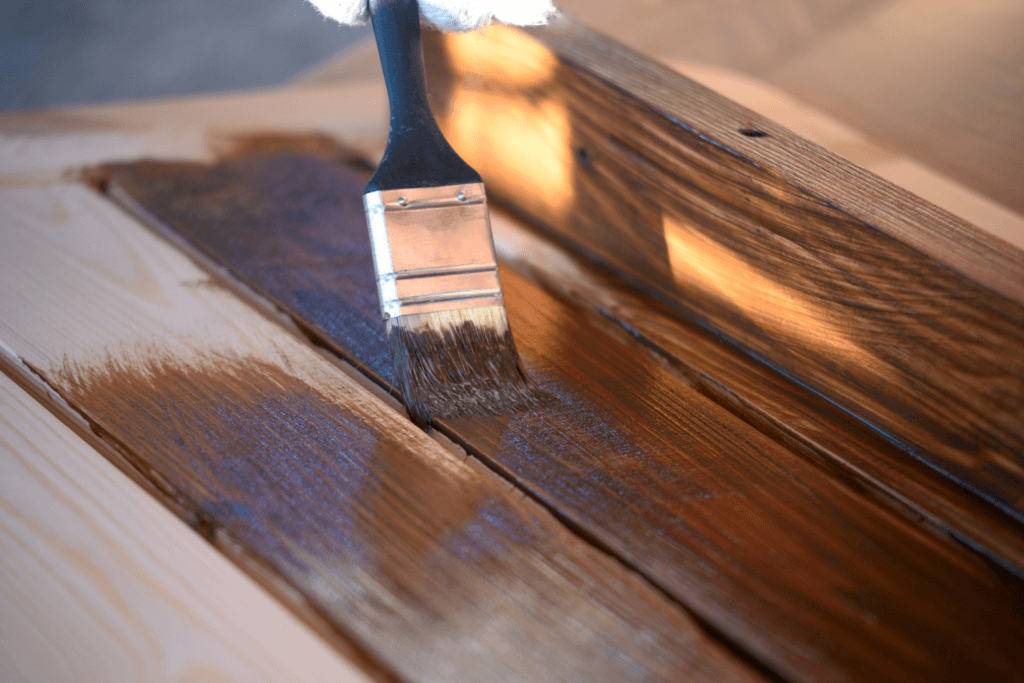
- Apply your chosen finish to protect the wood and enhance its appearance.
This simple DIY pallet project provides a stylish table for your space.
2. Chairs
You will need a few sturdy pallets, wood screws, sandpaper, a saw, and your preferred finish like paint, stain, or sealer. Below are the steps:
- Begin by selecting two or three pallets for the seat and backrest.
- Use sandpaper to smooth out any rough edges to avoid injuries.
- For the seat, stack one pallet on top of another for added height and comfort, securing them together with wood screws. You can customize the height based on your preference.
- Create the backrest by using another pallet, positioning it at a comfortable angle.
- Attach the backrest to the seat using screws.
- For stability, consider adding four legs. These can be cut from other pallets or made from wooden posts. Attach the legs to the corners of the chair.
- Once the chair is assembled, give it a final sanding and apply your chosen finish to protect the wood and enhance its appearance.
Add a unique touch to your outdoor or indoor space with a DIY pallet chair.
3. Benches
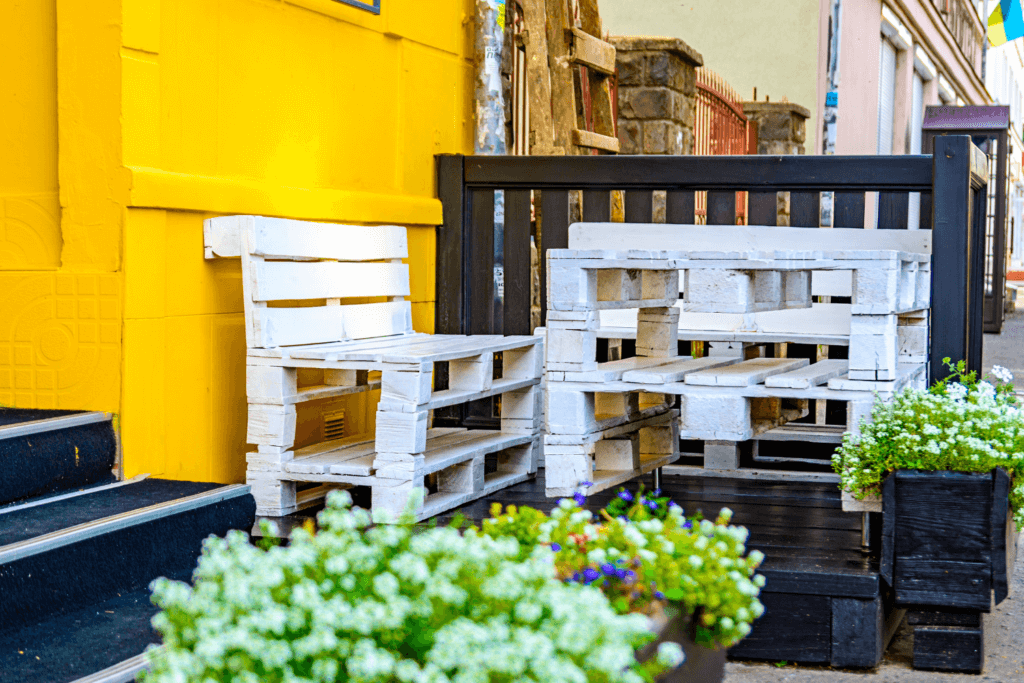
Start by gathering materials, including several sturdy pallets, wood screws, sandpaper, a saw, and a protective finish (such as paint or wood sealer). Here are the steps:
- Choose two or three pallets for the bench’s seat.
- Sand the surfaces to eliminate any rough edges and splinters, making it safe for use.
- To construct the seat, lay the pallets side by side to create a larger seating area.
- Secure them together with wood screws to prevent shifting.
- For added height and stability, you can stack an additional pallet underneath the seat pallets, effectively doubling the seating height and strength.
- For the legs, use four corner posts cut from other pallets or 4×4 lumber for a sturdier base. Attach the legs securely to the corners of the bench seat, ensuring they are all level for stability.
- If desired, you can add support beams between the legs for extra strength.
- Once assembled, give the entire bench a final sanding to smooth out any rough spots and apply your chosen finish to protect the wood and give it a polished look.
Creating a bench from pallets is a fun and practical project that enhances your outdoor or indoor space while being environmentally friendly.
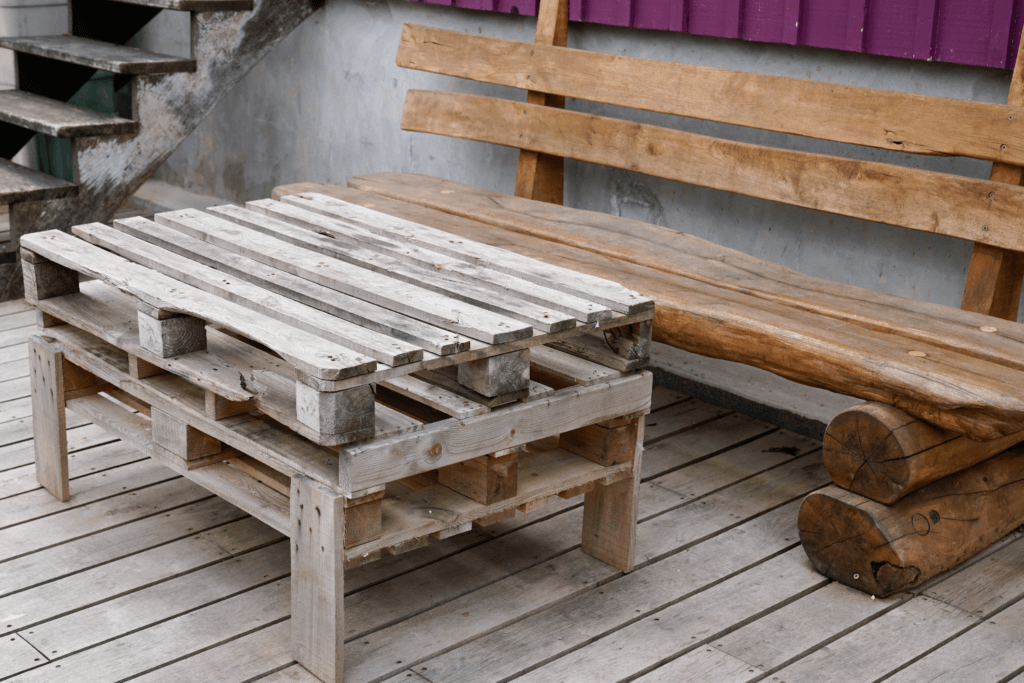
4. Coffee Tables
To get started, gather your materials: two or three sturdy pallets, wood screws, sandpaper, a saw, and a finish of your choice like paint or wood sealer. Here is the process:
- Use sandpaper to smooth out the surfaces and edges of the pallets.
- Decide on the height and style of your coffee table. For a low-profile table, stack two pallets on top of each other, securing them together with wood screws. If you prefer a taller design, you can use additional pallets to achieve your desired height.
- To create a flat tabletop, you might want to dismantle one of the pallets and use the slats to form a solid surface on top of your stacked pallets.
- You’ll need to create a sturdy base. For the legs, you can use four corner posts made from additional pallet wood or 4×4 lumber for added stability. Attach the legs to the corners of the bottom pallet.
- If you want added storage, consider leaving some space between the lower pallets or adding a shelf using another pallet piece.
- Give your table a thorough sanding to eliminate any rough spots, and apply your chosen finish to protect the wood and enhance its appearance.
A DIY coffee table from pallets is an excellent way to add a unique centerpiece to your living room while embracing sustainable practices.
5. Sofas
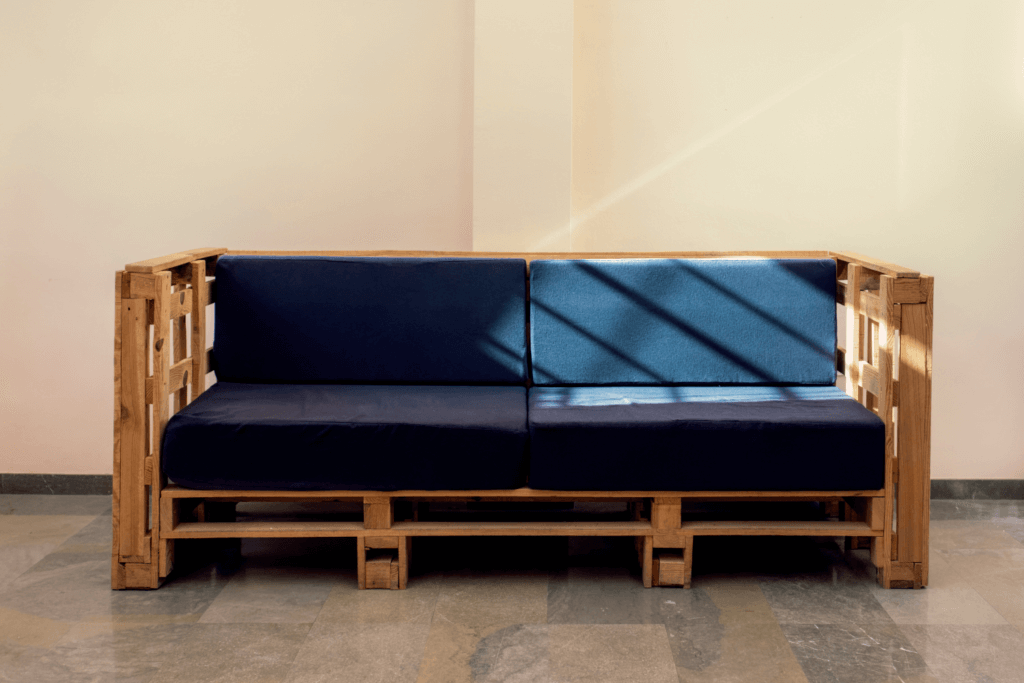
Prepare several sturdy pallets, cushions for seating, wood screws, sandpaper, a saw, and a protective finish like paint or wood sealer. Follow these steps:
- Select your pallets, ensuring they are intact and free of major damage.
- Sand the surfaces and edges to smooth out any rough spots and splinters.
- For a simple design, stack two or three pallets on top of each other for the backrest and two pallets for the seat. Secure the pallets together using wood screws to form a solid base.
- If you want a larger sofa, you can use more pallets and arrange them in an L-shape or U-shape configuration, depending on your space and style preference.
- For added comfort, you can place cushions on top of the pallets. Consider using outdoor cushions for durability if the sofa will be used outside.
- If desired, you can also create armrests by attaching additional pallets to the sides of the sofa, securing them with screws for stability.
- Once your sofa frame is assembled, give it a final sanding to ensure there are no rough edges.
- Apply your chosen finish to protect the wood and enhance its appearance.
Enjoy your new seating area, whether indoors or outdoors.
Shelving
The slatted design of pallets makes them ideal for creating shelving units that are both functional and aesthetically pleasing.
6. Bookshelves
Materials needed are several sturdy pallets, wood screws, sandpaper, a saw, and a finish of your choice. Below are the steps:
- Smooth out any rough edges of the pallets to ensure safety and a polished look.
- For a simple design, you can use two or three pallets vertically to create a sturdy back and two side supports. Secure these pallets together with wood screws to form the basic frame.
- You might want to create multiple shelves by cutting additional pallets into the desired height and attaching them between the side supports. For a more open and airy feel, consider using fewer pallets and spacing them out to create wider gaps for larger books or decorative items.
- Once the frame is constructed, add a solid surface on top or leave it open for a more rustic look.
- For stability, ensure all joints are securely fastened, and consider adding a back panel made from additional pallet wood to prevent items from falling off the back.
- Give the entire bookshelf a thorough sanding to smooth out any rough spots and apply your chosen finish to protect the wood and enhance its appearance.
This DIY pallet bookshelf not only provides a practical storage solution for your books but also serves as a beautiful display for decorative items.
7. Wall-Mounted Shelves
Gather your materials: a few sturdy pallets, wood screws, brackets for mounting, sandpaper, a saw, and your chosen finish. Below is the process:
- Cut pallets into smaller sections to create multiple shelves, or you can keep them intact for a larger shelf. A standard width for wall-mounted shelves is around 24 inches, but you can customize the length based on your available wall space.
- After cutting the pallets to your desired size, sand the edges and surfaces thoroughly.
- If you want a rustic look, attach brackets directly to the back of the pallet pieces for a more exposed appearance. Alternatively, for a cleaner look, create a frame by using additional pallet wood as a base, securing the shelves to the frame, and then mounting the entire frame to the wall.
- When ready to install, use a level to mark the desired height on the wall, ensuring that your shelves will be straight.
- Attach the brackets to the wall studs for maximum support, following the manufacturer’s instructions for installation.
- Once the brackets are secured, carefully place the shelves on top and secure them with screws if necessary.
- Apply your chosen finish to protect the wood and enhance its appearance.
Your new shelving adds character and charm to any room.
8. Pantry Organizers
Have a few sturdy pallets, wood screws, sandpaper, a saw, and a finish of your choice. Once ready, follow the steps below:
- Determine the size and design of your pantry organizers. You can create different configurations based on your storage needs, such as shelves, baskets, or tiered organizers.
- For a simple shelf organizer, cut the pallets to your desired width and height. Typically, a height of around 36 inches works well for easy access.
- Sand down any edges and ensure the surfaces are smooth.
- To create a tiered organizer, consider stacking several pallets vertically, with each shelf spaced apart to accommodate various pantry items.
- Secure the pallets together using wood screws, ensuring they are stable.
- If you prefer a basket-style organizer, you can cut the pallets into smaller sections and create sidewalls to form a box shape, perfect for storing smaller items like spices or snacks.
- When assembling your pantry organizers, ensure that all joints are secure. You might also want to add a back panel to prevent items from falling out the back.
- Once your organizers are assembled, give them a final sanding and apply your chosen finish to protect the wood and enhance its appearance.
Building pantry organizers from pallets is a practical and eco-friendly way to maximize your storage space.
Beds
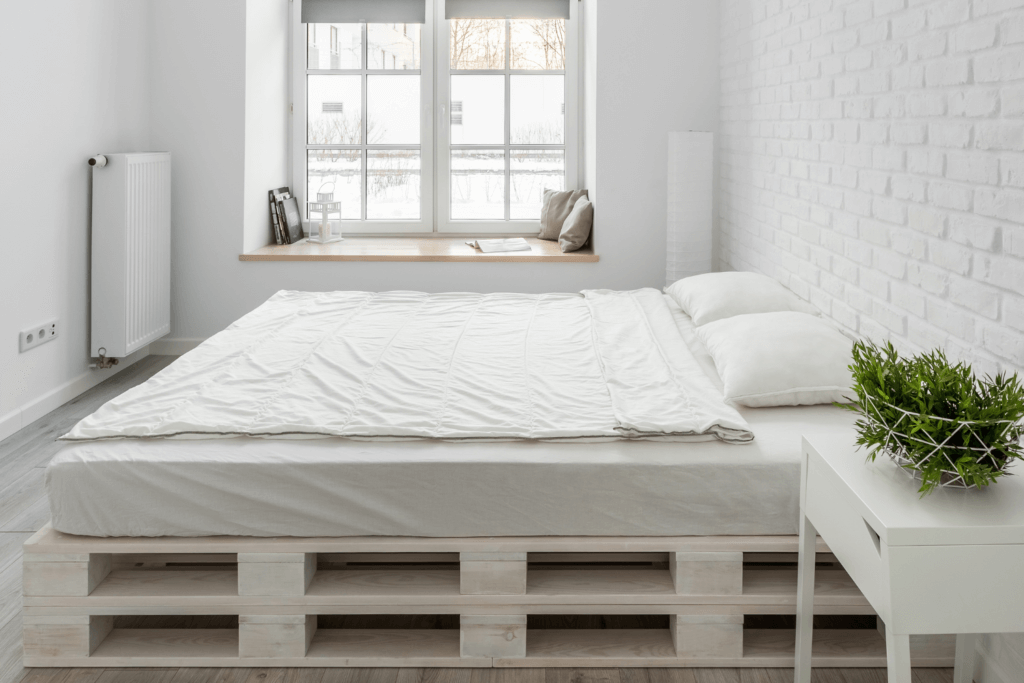
Pallets can support mattresses, making them perfect for creating platform beds and headboards.
9. Platform Beds
You need several sturdy pallets, wood screws, sandpaper, a saw, and a finish of your choice. Follow the process below:
- Sand the pallets’ surfaces and edges to smooth out any rough spots.
- For a queen-sized bed, you will typically need around 10-12 pallets. Lay the pallets side by side to form the base. You can use three or four pallets across to create a sturdy foundation.
- To create a solid surface, stack two layers of pallets on top of each other, securing them together with wood screws for added stability.
- If you prefer a lower profile, you can use fewer pallets for the base. If you want a taller bed, you can add more pallets or consider constructing legs from additional pallet wood. Attach the legs securely to the corners of the bottom pallets.
- For the headboard, repurpose additional pallets by standing them vertically at the head of the bed or using larger pallets as a backdrop. Secure them to the frame for added stability.
- Once the bed frame is assembled, give it a thorough sanding and apply your chosen finish to protect the wood and enhance its appearance.
This DIY pallet platform bed provides a functional sleeping space.
10. Headboards
The materials include several sturdy pallets, wood screws, sandpaper, a saw, and a finish of your choice (such as paint or wood sealer).
- Choose your pallets, and then sand the surfaces and edges to smooth out any rough spots for a polished and safe finish.
- For a standard queen-sized bed, a headboard width of around 60 inches works well. You can use one or two pallets horizontally to create the desired width.
- If you prefer a taller headboard, stack additional pallets vertically to reach your desired height, typically between 30 to 48 inches.
- Once you’ve chosen your design, cut the pallets to the appropriate sizes if needed.
- For a more cohesive look, you can dismantle the pallets and arrange the slats in a pattern that appeals to you, such as vertical or horizontal layouts.
- Secure the slats together using wood screws, ensuring they are tightly fastened.
- To attach the headboard to your bed frame, you can either mount it directly to the wall using brackets for added stability or secure it to the bed frame by attaching wooden posts to the bottom of the headboard. Ensure the headboard is level and securely fastened.
- Give your headboard a thorough sanding to smooth any rough edges and apply your chosen finish to protect the wood and enhance its appearance.
Enjoy your DIY pallet headboard!
Garden Projects
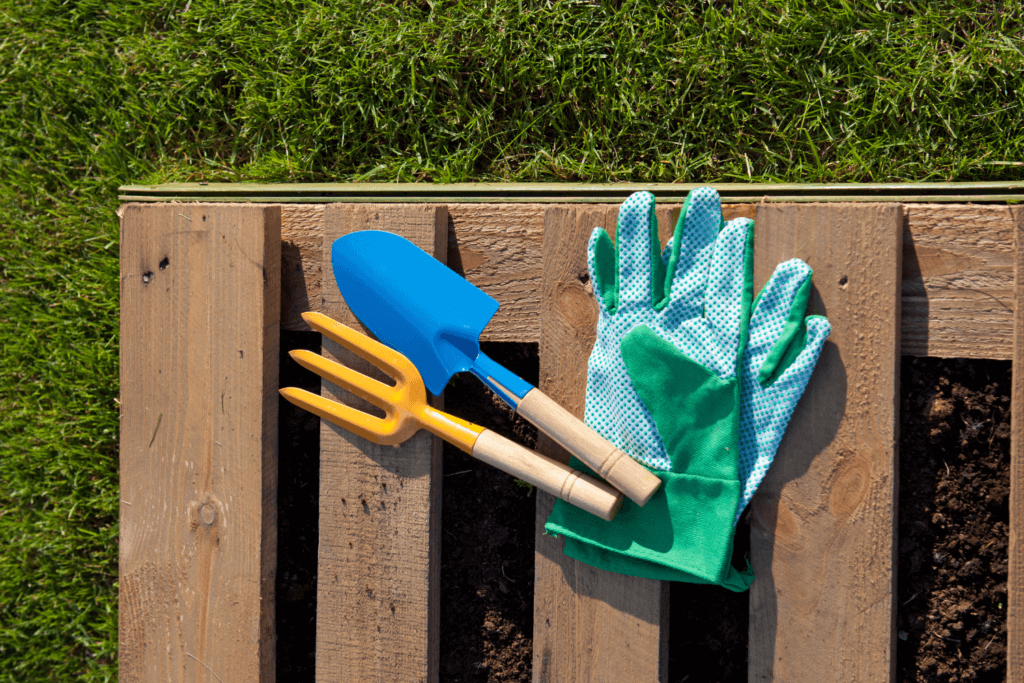
Pallets can be repurposed into planters, garden beds, vertical gardens, and compost bins.
11. Planters
You need a sturdy pallet, wood screws, sandpaper, a saw, a liner (such as landscaping fabric or plastic), and a finish of your choice (like paint or wood sealer). Below are the steps:
- Choose a pallet that is in good condition.
- Sand the surfaces and edges to remove any rough spots, making it safe and visually appealing.
- If opting for a vertical planter, secure the pallet upright by placing it against a wall or fence.
- Reinforce the pallet structure by adding additional slats across the back to support the weight of the soil and plants.
- Line the inside of your planter with landscaping fabric or plastic to help retain moisture while allowing excess water to drain.
- Apply your chosen finish to protect the wood from the elements, ensuring longevity for your planter.
- Fill your new pallet planter with soil and choose your favorite plants, herbs, or flowers to fill it.
This is a wonderful way to add greenery to your outdoor space while repurposing materials sustainably.
12. Raised Garden Beds
Gather your materials such as several sturdy pallets, wood screws, sandpaper, a saw, landscape fabric, and soil. Follow these steps:
- Sand the surfaces and edges of the pallets to smooth out any rough spots.
- Determine the size and shape of your raised garden bed. A standard size for a raised bed is typically 4 feet by 8 feet, but you can customize the dimensions based on your available space.
- Depending on the height you desire, you can stack two or more pallets vertically. If using the pallets as is, each pallet will generally provide about 12 inches of height.
- To assemble the raised garden bed, lay the pallets flat on the ground in your chosen configuration. If you’re using multiple pallets, secure them together at the corners with wood screws.
- Reinforce the corners with brackets. Ensure the structure is level, so water drains evenly.
- Line the inside of the raised bed with landscape fabric to prevent weeds from growing through the soil while allowing for proper drainage.
- If desired, you can add a layer of gravel at the bottom to improve drainage further.
- Fill the bed with high-quality soil or compost, ensuring it is well-mixed for optimal plant growth.
- Start planting!
Enjoy the fruits of your labor as you cultivate your plants in this unique and eco-friendly garden space.
13. Compost Bins
You need three to four sturdy pallets, wood screws, sandpaper, and optional hinges and a latch for a door. Here is what to do:
- Choose pallets that are free from damage or splinters, and sand the surfaces and edges to ensure safety and comfort.
- Arrange three pallets in a U-shape on the ground, with one pallet acting as the back wall and two as the side walls.
- Secure the pallets together at the corners using wood screws to create a stable structure.
- If desired, you can add a fourth pallet as a front door for easy access to your compost. Attach this pallet using hinges to one side.
- If you prefer a more open design, you can leave the front side open but consider adding a latch to secure the bin when closed.
- Ensure proper airflow by leaving gaps between the pallets or cutting small ventilation holes. This is essential for the composting process, as it allows oxygen to reach the materials inside.
- Line the bottom of the bin with a layer of coarse materials like straw or small branches to enhance drainage and aeration.
- Fill it with a balanced mix of “green” materials (fruit and vegetable scraps, grass clippings, and coffee grounds) and “brown” materials (dried leaves, cardboard, and shredded paper).
- Turn the compost regularly to aerate it and speed up decomposition.
- Monitor the moisture level in your compost bin. It should be damp but not soggy.
This DIY pallet project is a practical and eco-friendly way to manage kitchen scraps and yard waste while enriching your garden soil.
14. Vertical Gardens
Have a sturdy pallet, landscape fabric, potting soil, plants or seeds of your choice, and optional wood screws, sandpaper, and a finish. Below is the process:
- Position the pallet upright against a wall or fence to determine the best location for your vertical garden. You can choose to leave the pallet as is or dismantle it to create individual planter boxes.
- If you opt for the latter, cut the pallet into sections that can serve as planters, typically about 12 to 18 inches deep. If you decide to keep it intact, create small planting pockets between the slats.
- Line the back and sides of the pallet (or the individual planters) with landscape fabric to help retain soil while allowing for drainage.
- Secure the fabric with staples or small nails to ensure it stays in place.
- Fill each planter with potting soil, making sure to leave some space at the top for the plants.
- When it comes to selecting plants, consider using herbs like basil, parsley, or mint, which thrive in smaller spaces, or flowers that can cascade down for added visual interest.
- Arrange the plants according to their sunlight and watering needs, keeping in mind that taller plants should go towards the top of the pallet, with smaller plants below.
- Once your pallet is planted, position it in a sunny spot.
- Water your vertical garden regularly, allowing it to drain properly to prevent overwatering.
This project is perfect for small yards, balconies, or even indoors, allowing you to grow herbs, flowers, and small vegetables in a compact area.
Outdoor Decor
Pallets are weather-resistant and versatile, so they can be transformed into outdoor furniture and decorative items.
15. Decks
Here are the materials: several sturdy pallets, wood screws or nails, sandpaper, a saw, and optional wood stain or sealer. Follow these steps:
- Sand the pallets’ surfaces and edges to ensure a smooth finish.
- Determine the size and layout of your deck. Consider the space available and how you intend to use the deck. A typical pallet deck can range from a simple 8-foot by 8-foot square to a larger custom design, depending on your needs.
- Lay out the pallets in your desired configuration on a flat, level surface. If you are building a larger deck, you may want to create a frame with additional pallets or timber for added stability.
- Secure the pallets together using wood screws or nails.
- For added support, attach additional pallets underneath, creating a double-layered structure.
- Ensure that all connections are tight and that the pallets are aligned properly.
- If your deck will be raised, consider adding support beams or concrete blocks underneath to elevate it off the ground safely.
- Once your structure is assembled, you can choose to leave it as is or add a surface treatment for aesthetics and protection.
- Apply a wood stain or sealer to protect the pallets from the elements and prolong their lifespan.
- Consider adding finishing touches. You can create built-in seating with additional pallets, or add cushions and outdoor furniture to create an inviting space.
- Consider installing a railing if your deck is raised to ensure safety.
Building a deck from pallets is an affordable and creative way to expand your outdoor living space.
16. Patios
Gather several sturdy pallets, wood screws or nails, sandpaper, a saw, and optional wood stain or sealer. Follow the steps below:
- Choose pallets that are in good condition and free from significant damage or splinters, then use sandpaper to smoothen the pallets’ surfaces and edges.
- Determine the size and layout of your patio. Consider how you intend to use the space and choose a location that is relatively level and well-drained. A common size for a pallet patio can range from a small 10-foot by 10-foot area to a larger 12-foot by 16-foot space.
- Once you have your dimensions, lay out the pallets in your desired configuration on the ground.
- To create a stable and even surface, secure the pallets together using wood screws or nails.
- If necessary, you can use additional pallets as a base for added height and support, especially if your patio will be raised.
- For larger patio areas, consider reinforcing the structure with additional support beams or timber to create a more robust framework.
- After assembling the pallets, check for levelness and make any necessary adjustments.
- If you want a finished look, consider applying a wood stain or sealer to protect the wood from the elements and enhance its appearance.
- Once your pallet patio is complete, add decorative elements to enhance the space.
A DIY pallet patio can serve as a charming area for relaxation, dining, or entertaining guests in your backyard or garden.
17. Outdoor Bars
To get started, you need several sturdy pallets, wood screws or nails, sandpaper, a saw, and optional wood stain or sealer. Below is the process:
- Ensure that the pallets are in good condition, free from major damage or splinters.
- Sand down any rough edges for safety and aesthetics.
- Lay out the pallets to form the main structure of the bar. For a simple design, you can use two pallets for the sides and one or two for the top, depending on the height and width you desire.
- To construct the bar, secure the side pallets together with wood screws or nails to create a stable frame
- If you are using multiple pallets for the top, make sure they are aligned properly and securely fastened.
- Consider adding additional support beneath the top pallets, using smaller pieces of wood or extra pallets, to ensure it can hold the weight of drinks and bar supplies.
- Once the basic structure is assembled, add decorative elements to enhance the design. You can also use the pallets to create a small storage area for bar tools, such as shakers and mixers.
- To improve the appearance and durability of your outdoor bar, consider applying a wood stain or sealer to protect it from the elements. You can choose a finish that matches your outdoor decor.
This DIY pallet project enhances your backyard or patio, providing a stylish space for entertaining and enjoying drinks with family and friends.
18. Picnic Tables
The materials needed are several sturdy pallets, wood screws or nails, sandpaper, a saw, and optional wood stain or sealer.
- Sand the surfaces and edges of the pallets to ensure safety and comfort.
- For a classic design, you will need two pallets for the tabletop and two more for the benches, along with additional pallets for the support structure and legs.
- Start by assembling the tabletop. Lay two pallets side by side to create a larger surface area, securing them together with wood screws or nails.
- For added stability, you can place a third pallet on top, if desired.
- Once the tabletop is secure, create the legs. Cut four pallets into pieces to form sturdy legs.
- Attach the legs to the underside of the tabletop and secure them with screws.
- If you want to add benches on either side, you can use two additional pallets as the bench seats. Secure these to the legs.
- After assembling the table and benches, check for stability and make any necessary adjustments.
- Apply a wood stain or sealer to protect the wood from the elements and enhance its appearance.
Your new picnic table is a perfect spot for family gatherings, barbecues, or relaxing meals outdoors.
Storage Solutions
Their structure lends itself well to creating storage units, such as racks, cabinets, and organizational systems.
19. Shoe Racks
Prepare these materials: two to three sturdy pallets, wood screws or nails, sandpaper, a saw, and optional wood stain or sealer. Here is the process:
- Determine the size and design of your shoe rack based on the number of shoes you need to store and the available space. A simple shoe rack can be designed with two pallets for the shelves. If you have a larger collection, consider adding a third pallet for additional shelves.
- Lay the first pallet on the ground as the base of your shoe rack. This will serve as the bottom shelf. You can reinforce the bottom with additional wooden supports to create a more stable structure.
- Cut the second pallet into pieces that will serve as vertical supports or legs. Attach these supports to the corners of the base pallet using wood screws.
- Once the vertical supports are in place, attach the second pallet horizontally to create the first shelf for your shoes. Make sure it is level and securely fastened.
- If you are using a third pallet, repeat this process to create a second shelf.
- After assembling the shoe rack, check for stability and make any necessary adjustments.
- For a finished look and added durability, consider applying a wood stain or sealer to protect the wood from moisture and wear.
This DIY project is perfect for entryways, closets, or mudrooms, helping to keep your shoes tidy and easily accessible.
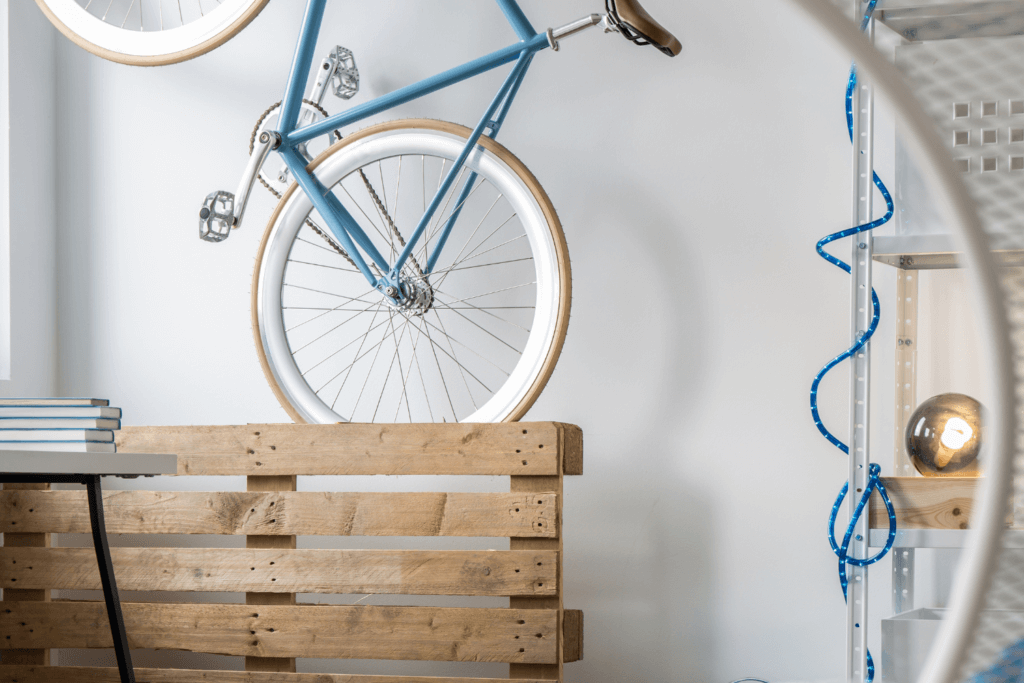
20. Bike Racks
Get two or three sturdy pallets, wood screws or nails, sandpaper, a saw, and optional wood stain or sealer. Follow these steps:
- Choose pallets that are in good condition, and sand down any rough edges for safety.
- Lay one pallet flat on the ground as the base of your bike rack. This will provide stability.
- If you are using a second pallet as a back support, secure it vertically to the back of the base pallet using wood screws or nails. Ensure it is sturdy enough to support the weight of the bikes.
- You can customize the design to create bike slots. For this, cut additional pieces from the pallets to form vertical dividers. Position these dividers at equal intervals along the width of the base pallet, creating separate slots for each bike.
- Secure the dividers in place with screws to ensure they are stable.
- Once the structure is complete, check for stability and make any necessary adjustments.
- For a polished look and enhanced durability, consider applying a wood stain or sealer to protect the wood from the elements, especially if the rack will be used outdoors.
The bike rack can be customized to accommodate multiple bikes and is ideal for garages, backyards, or near entryways.
21. Tool Organizers
To get started, have two or more sturdy pallets, wood screws or nails, sandpaper, a saw, and optional wood stain or sealer.
Make sure to choose pallets that are in good condition, free from splinters and damage, and sand down any rough edges for safety.
- Begin by determining the size and design of your tool organizer. A simple design could consist of a vertical organizer mounted on the wall or a freestanding unit that can hold various tools. For a basic wall-mounted organizer, you can use one pallet as the main back panel and attach smaller pieces from another pallet for shelving and tool storage.
- Lay your first pallet flat against the wall where you plan to mount it. This will serve as the back panel of your organizer.
- If the pallet is not already stained or sealed, you might want to do this first to protect the wood from moisture and wear.
- Cut additional pallet pieces to create shelves, hooks, or dividers for organizing tools. For instance, you can create horizontal shelves by cutting pallet boards to size and attaching them securely to the back panel at different heights. This will provide space for larger tools or storage bins.
- For smaller tools, consider adding vertical dividers or hooks to the panel. You can create hooks by cutting pallet wood into shorter pieces and securing them horizontally across the panel. Make sure the hooks are securely fastened and spaced appropriately.
- Once your tool organizer is assembled, check for stability and make any necessary adjustments.
- Apply a wood stain or sealer if you haven’t done so already.
This DIY project is perfect for garages, sheds, or workshops, allowing you to easily store and access your tools without clutter.
22. Pallet Boxes
You will need two to three sturdy pallets, wood screws or nails, sandpaper, a saw, and optional wood stain or sealer. Below is the process:
- Use sandpaper to smoothen the rough edges of the pallets.
- Lay one pallet flat on the ground to serve as the base of your box. This will provide stability for whatever items you plan to store.
- Cut the other pallets into pieces for the sides. The height of the sides can vary based on your preference, but a standard height of 12 to 18 inches is usually functional.
- Attach the side pieces to the edges of the base pallet using wood screws or nails.
- Cut pieces for the front and back of the box.
- The front panel can have a hinged lid if you want easy access to the contents. To create a hinged lid, cut another pallet board to the size of the box top, ensuring it can swing open.
- Attach it using heavy-duty hinges on the back edge of the box.
- For added support and stability, consider reinforcing the corners with additional wood pieces.
- If you plan to use the box outdoors, apply a wood stain or sealer to protect it from the elements.
Once your pallet box is complete, you can personalize it with decorative elements, such as stenciling or painting, to match your decor.
Home Decor
Pallets can be deconstructed and reassembled into various decor items, including picture frames and wall art, adding a rustic touch to interiors.
23. Picture Frames
Prepare one or two pallets, wood screws or nails, sandpaper, a saw, a measuring tape, and optional wood stain or sealer. Here is what to do:
- Ensure the pallets are in good condition, and sand down any rough edges for a polished finish.
- Decide on the size of the picture frame based on the dimensions of the photo you will display.
- Measure and mark the dimensions on the pallets, and then use a saw to cut the pallets into four pieces that will form the frame: two longer sides and two shorter sides.
- Lay the cut pieces on a flat surface to assemble the frame. Start by arranging the longer pieces horizontally and the shorter pieces vertically, forming a rectangular shape.
- Secure the corners of the frame using wood screws or nails.
- If you want a more decorative touch, consider using a miter saw to create angled cuts on the corners, which will give your frame a more finished look.
- Once the frame is assembled, sand the surfaces to ensure there are no rough edges. This step is essential for safety and for achieving a polished appearance.
- At this point, you can choose to leave the frame in its natural wood state or apply a wood stain or sealer to enhance its appearance and protect it from wear. If you decide to stain it, allow the wood to dry completely before proceeding.
- To hold the picture in place, cut a piece of cardboard or thin plywood to fit the back of the frame, and attach it using screws or nails.
- For added convenience, you can also use small clips or brackets to hold the photo securely in place.
- If you would like to display the frame on a table, attach a small stand to the back.
- You can attach hanging hardware if you prefer to mount it on the wall.
Enjoy your new picture frame as a beautiful addition to your home decor.
24. Wall Art
Here are the materials: one or more pallets, wood screws or nails, sandpaper, a saw, paint or wood stain, and optional decorative elements like stencils or brushes.
Make sure the pallets are in good condition, free from splinters and damage, and sand down any rough edges for safety.
- If you want to create a large piece, use multiple pallets arranged together. For a simple design, cut one pallet into smaller pieces to create a collage effect or individual canvases. If you want a geometric look, cut the pallet into different shapes.
- Once you have your pieces cut, lay them out on a flat surface to visualize your design. Experiment with different arrangements until you find one that you love.
- Once you’ve settled on a layout, secure the pieces together using wood screws or nails.
- If you are making a larger piece, attach a back support for added stability.
- Paint the wood in various colors or apply wood stain for a more natural look. If you’re using paint, consider using a brush or sponge for a textured effect, or experiment with stencils to create intricate designs or lettering.
- Once the paint or stain is dry, add additional decorative elements.
- Prepare your wall art for display. Attach hanging hardware to the back or use adhesive strips, nails, or picture hanging kits for a secure mount.
Whether you want to make a simple geometric design, a rustic sign, or a vibrant mural, the possibilities are endless.
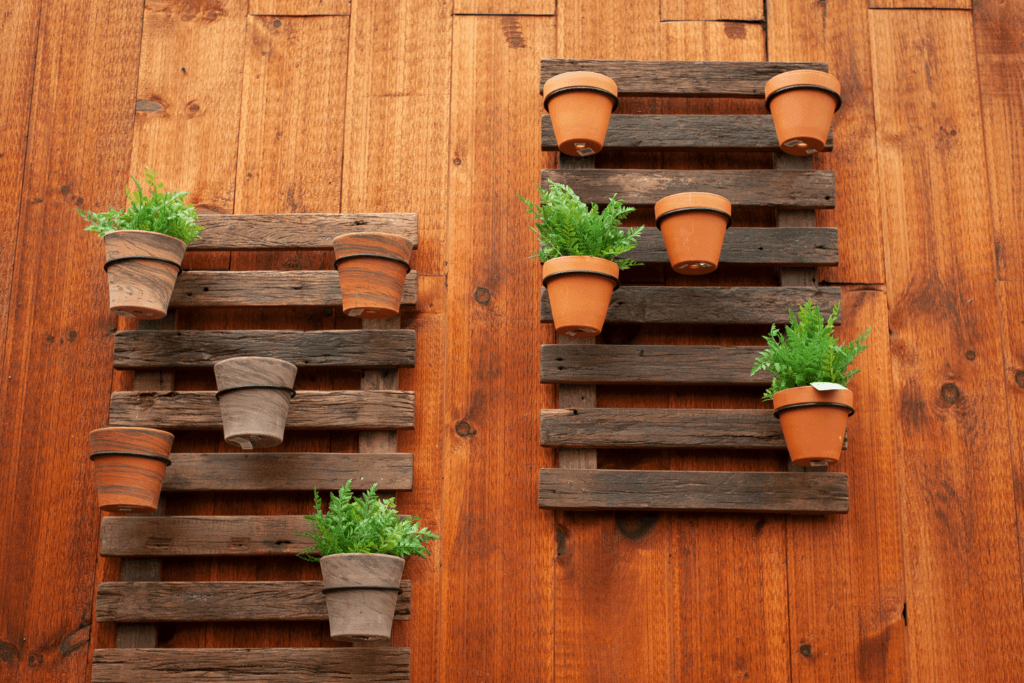
25. Rustic Signs
The materials include one or two sturdy pallets, wood screws or nails, sandpaper, a saw, paint or wood stain, stencils or brushes, and optional decorative elements like twine or fabric.
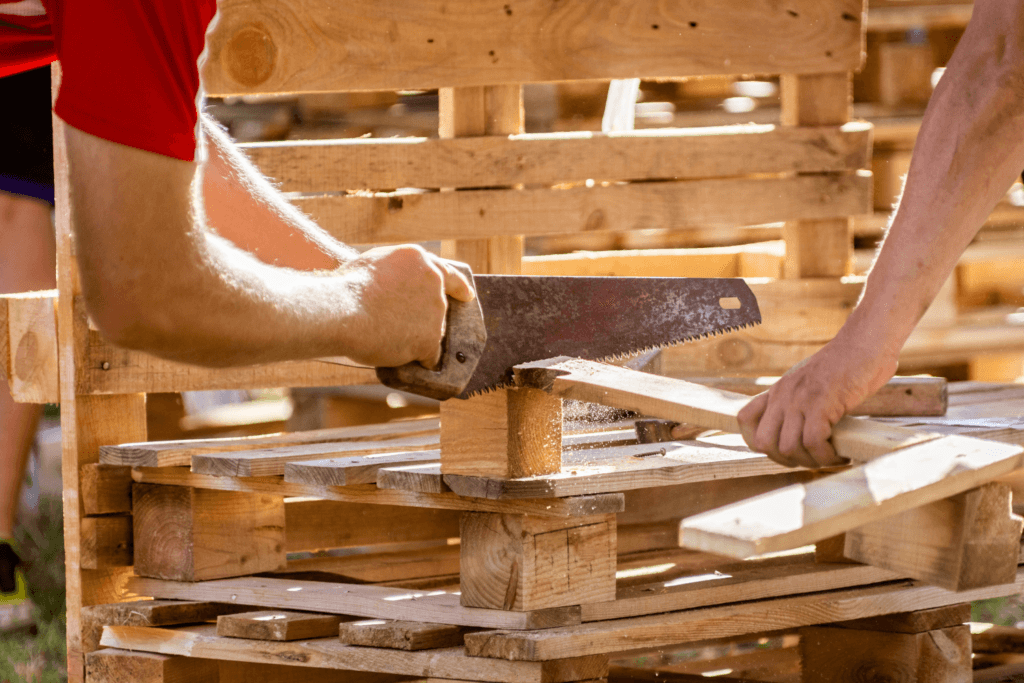
- Use a saw to cut the pallet boards to the desired length and shape.
- Once you have your boards cut, lay them out on a flat surface to visualize your design. Arrange the boards in a way that best displays your message or design.
- If you are creating a multi-board sign, secure them together using wood screws or nails to form a solid structure. For added stability, attach a horizontal support piece across the back of the sign.
- Sand the surfaces to eliminate any rough edges and ensure a smooth finish.
- If you plan to stain or paint the wood, now is the time to do so. You can choose a natural wood stain for a classic rustic look or use vibrant paint colors to make your sign stand out. Allow the paint or stain to dry completely before proceeding.
- To add your message, you can either freehand it, use stencils, or print out letters to trace. If you’re using stencils, secure them to the board and carefully paint over them, ensuring crisp edges.
- For a more personalized touch, add decorative elements.
- Once your message is painted and dry, attach hanging hardware or a sturdy rope to the back of the sign for easy mounting.
- You can also create a stake to display your sign in a garden or outdoor space by attaching a wooden dowel or post to the back.
This DIY rustic sign project will surely enhance your home’s decor.
Kids’ Projects
Safe and easy to work with, pallets can be turned into playhouses, swings, or sandboxes, providing fun and creativity for kids.
26. Playhouses
Gather your materials such as several sturdy pallets, wood screws or nails, sandpaper, a saw, a measuring tape, and optional paint or wood stain.
- Inspect the pallets for damage and sand down any rough edges to ensure safety.
- Design your playhouse layout. Consider the size and shape based on the space available in your yard and the number of children who will be using it.
- Once you have a design, start by laying the foundation. Select a few pallets to form the base of your playhouse and secure them together using wood screws or nails. Ensure the base is level and stable, as this will support the entire structure.
- If desired, raise the playhouse by stacking pallets to create a floor that’s elevated from the ground.
- Build the walls using additional pallets. Attach the pallets vertically to create the sides of the playhouse. You can leave gaps between the pallets for windows or doorways.
- Once the walls are up, add a roof. You can use whole pallets laid flat to create a simple roof or cut them into triangles for a pitched roof design. Make sure the roof is securely attached and has a slight overhang to protect against rain.
- After the basic structure is complete, add details that will enhance the playhouse’s appeal. Paint the exterior in bright colors or a fun theme. You can also add accessories like a small porch, flower boxes, or outdoor furniture made from pallets for a cozy touch.
- Inside, consider adding a soft floor with carpet remnants or blankets for comfort. You can also incorporate shelves for toys or a small table and chairs for pretend tea parties.
- Ensure that the playhouse is safe for children by checking for any sharp edges or loose parts.
Building a playhouse is not only an eco-friendly way to repurpose pallets. It also allows you to create a structure that fits your children’s interests.
27. Swings
You will need a sturdy pallet (or two, depending on your design), heavy-duty rope or chain, wood screws or nails, sandpaper, a saw, and optional paint or wood stain for finishing.
- Begin by deciding on the size and design of your swing. If you want a more spacious seat, consider attaching two pallets side by side to create a larger swing.
- Once you have your design in mind, use a saw to cut the pallet if necessary, making sure to maintain a consistent size and shape.
- After cutting the pallet, sand down all surfaces thoroughly to eliminate any rough edges and splinters.
- If you wish to enhance the appearance of your swing, you can apply a wood stain or paint in your favorite colors. Let the finish dry completely before proceeding.
- Next, cut two lengths of heavy-duty rope or chain, ensuring they are long enough to hang the swing at a comfortable height (usually around 18 to 24 inches off the ground).
- For added security, consider using a double knot or attaching the rope to a sturdy eye bolt secured into the corners of the pallet. If you are using chain, connect it securely with appropriate hardware.
- To hang the swing, find two sturdy trees or a swing frame that can support the weight. Measure and mark the height at which you want the swing to hang, ensuring it is level and secure.
- Using a level, attach the rope or chain to the support structure. Make sure that the swing can move freely without obstructions.
Before your swing is ready for use, perform a safety check to ensure that everything is securely fastened and that the swing hangs at a comfortable height.
28. Sandboxes
Have several sturdy pallets, sand, wood screws or nails, sandpaper, a saw, a measuring tape, and optional outdoor paint or wood stain. Follow these steps:
- Decide on the size and shape of your sandbox. A rectangular or square design is common, but you can get creative with shapes like circles or octagons.
- Measure and mark your desired dimensions using the measuring tape.
- Once you have your measurements, use a saw to cut the pallets if needed. You may want to use whole pallets as the base and sides or break down the pallets into smaller pieces.
- For a simple rectangular sandbox, arrange the pallets vertically to form the sides, securing them together with wood screws or nails.
- Next, create a bottom for your sandbox. You can use additional pallet boards laid flat or place a layer of landscape fabric to prevent weeds from growing up through the sand. If you opt for landscape fabric, cut it to fit the inside of the sandbox and secure it with a few staples.
- After the base is in place, sand all surfaces of the sandbox thoroughly to eliminate any rough edges or splinters.
- If desired, apply outdoor paint or wood stain to protect the wood from the elements and enhance its appearance. Allow the finish to dry completely before moving on.
- Once the sandbox structure is complete, fill it with clean, dry sand. Spread the sand evenly within the sandbox, typically filling it to a depth of about 6 to 12 inches.
- To enhance the sandbox experience, consider adding some fun accessories such as buckets, shovels, and molds for building sandcastles.
- You might also want to create a cover for the sandbox to keep it clean and protect it from rain or animals when not in use.
This DIY pallet sandbox project provides hours of entertainment for kids.
29. Toy Storage
You need a few sturdy pallets, wood screws or nails, sandpaper, a saw, a measuring tape, and optional paint or wood stain for finishing.
- Begin by determining the size and design of your toy storage unit. Consider the types of toys you need to store. This will help you decide on the layout and compartments.
- Use a saw to cut the pallets to the desired dimensions. If you are using whole pallets, you might opt to use the base of the pallet as a shelf and the sides as barriers to keep toys from falling out. You can also disassemble the pallets and use the individual boards to create shelves or dividers.
- Secure the pallets together using wood screws or nails.
- If you are building a multi-tiered storage unit, stack the pallets and attach them securely.
- For added stability, consider using L-brackets at the corners or adding a back panel.
- After assembling the structure, sand all surfaces thoroughly to remove any rough edges or splinters, ensuring a safe environment for children.
- Apply a coat of paint or wood stain. Choose bright colors or a natural finish that complements your decor. Allow the paint or stain to dry completely before moving on.
- To customize the toy storage, consider adding small bins or baskets within the compartments. This will help categorize toys and make it easier for children to find and return items. Labeling each compartment can also encourage kids to help with clean-up.
- Place your pallet toy storage in an accessible location for children. This could be in a playroom, living room, or even in a bedroom.
This DIY pallet project is a fun way to declutter while creating a functional and attractive solution for toy organization.
Pet Furniture
Pallets are perfect for creating pet beds, feeding stations, and shelters due to their durability and easy customization.
30. Pet Beds
Gather one or two sturdy pallets, wood screws or nails, sandpaper, a saw, a measuring tape, a cushion or dog bed for comfort, and optional paint or wood stain for finishing.
- If you have a smaller pet, you can use a single pallet or cut down a larger one to the desired size. Measure and mark the dimensions on the pallet with your measuring tape.
- Once you have your measurements, use a saw to cut the pallet if necessary.
- If you are using two pallets, you can stack them to create a raised bed that provides extra comfort and support.
- Secure the pallets together using wood screws or nails to ensure stability. Make sure the corners are tightly fastened to prevent any wobbling.
- After assembling the structure, sand all surfaces thoroughly to eliminate any rough edges or splinters. This step is crucial for ensuring your pet’s safety.
- To enhance the appearance of the pet bed, apply a coat of paint or wood stain in a color that complements your home decor. Choose a non-toxic finish that is safe for pets, and allow it to dry completely before moving on.
- Place a soft cushion or dog bed inside the pallet frame. You can use a store-bought dog bed or make a custom cushion using foam and fabric. Add removable covers for easy cleaning.
- For an added touch, you can personalize the pet bed by painting your pet’s name or adding decorative elements like stencils or decals.
- If you want to provide some shade, consider attaching a small canopy or fabric cover that can protect your pet from direct sunlight when used outdoors.
Enjoy watching your pet snuggle up in their new bed, knowing you created it.
31. Pet Feeding Stations
Have one or two sturdy pallets, wood screws or nails, sandpaper, a saw, a measuring tape, and optional paint or wood stain for finishing.
Additionally, you will need pet food and water bowls that fit your pet’s size, and optional rubber mats to keep the area clean.
- Sketch a design that includes space for both food and water bowls.
- Once you have your design in mind, use a saw to cut the pallets to the desired dimensions. You may choose to use one pallet as a base and add shelves or platforms for the bowls.
- To create a raised feeding station, stack two pallets on top of each other and secure them together with wood screws or nails.
- After assembling the structure, sand all surfaces thoroughly to remove any rough edges or splinters, ensuring a safe feeding environment.
- To enhance the appearance of your feeding station, apply a coat of paint or wood stain in a color that complements your decor. Use a non-toxic finish that is safe for pets.
- Mark the spots for the food and water bowls on the pallet. Depending on the size of your bowls, you may need to cut out holes in the wood to create recessed spaces that hold the bowls securely.
- Use a saw to carefully create these openings, ensuring they are the right size for the bowls to fit snugly without tipping over.
- Once the bowls are in place, add rubber mats or a waterproof liner around the feeding station to catch any spills and make cleaning easier.
Place your completed pet feeding station in a convenient location where your pet can easily access it.
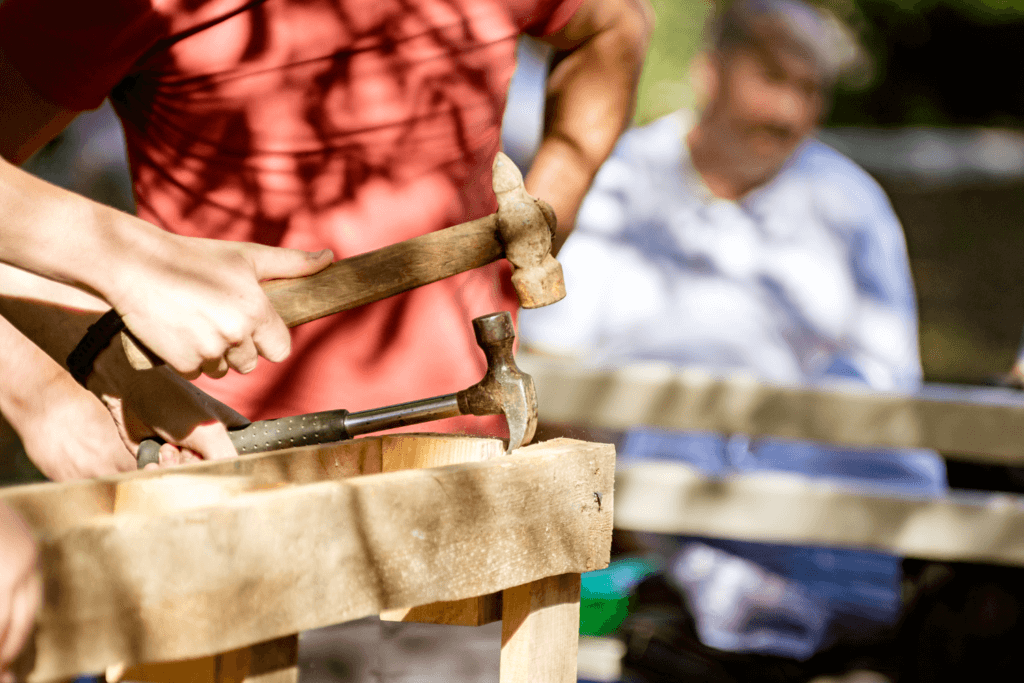
Lighting Fixtures
With a bit of creativity, pallets can be used to craft unique chandeliers, floor lamps, and wall sconces.
32. Chandeliers
You need one or two pallets, a saw, wood screws or nails, sandpaper, a measuring tape, a light fixture kit, hooks or chains, and optional paint or wood stain for finishing.
- Cut the pallets to your desired dimensions to create a custom shape. Consider whether you want a rectangular, square, or more intricate design. Sketching a plan can help visualize your final product.
- Use a saw to cut the pallets into the necessary pieces. You can create a multi-layered chandelier by cutting the pallets into smaller sections and stacking them to create depth. For a simple design, leave the pallets intact or break them down into slats to form a more open structure.
- After cutting the pieces, sand all surfaces thoroughly to eliminate any rough edges or splinters. This step is essential for safety and achieving a polished look.
- If desired, apply a coat of paint or wood stain to enhance the appearance of your chandelier. Choose a finish that complements your decor, and allow it to dry completely before proceeding.
- Assemble the chandelier by attaching the cut pieces together using wood screws or nails. If you are creating multiple layers, secure each layer with additional screws for stability. You may also want to use a strong adhesive to reinforce the joints.
- Install the light fixture. Follow the instructions that come with your light fixture kit to attach the socket and cord securely to the chandelier. Make sure the electrical components are safely positioned and well-insulated to prevent any hazards. If you’re not comfortable working with electrical wiring, consider hiring a professional for this part of the project.
- After installing the light fixture, attach hooks or chains to the top of the chandelier for hanging.
- Choose a location with sufficient ceiling height and install a compatible ceiling hook or anchor.
- Once the chandelier is hung securely, insert the light bulb and test the fixture to ensure it works.
This DIY pallet project allows you to repurpose wooden pallets into a stunning light fixture, showcasing your creativity while providing a unique source of illumination.
33. Floor Lamps
You need a pallet, a saw, sandpaper, wood screws or nails, a lamp kit, a lampshade, and optional paint or wood stain for finishing. Below is the process:
- Sketch out your design, considering how you want the lamp’s base, body, and shade to look. You may want to use the pallet as a whole or cut it down to create a more refined shape.
- Once you have your design in mind, use a saw to cut the pallet to the desired dimensions. For a simple design, you can use one full pallet as the base and another piece of wood for the lamp’s height. You can also create a more elaborate structure by cutting the pallets into smaller sections and assembling them in a unique pattern.
- After cutting the wood, sand all surfaces thoroughly to remove any rough edges or splinters.
- Apply a coat of paint or wood stain to enhance the appearance of your floor lamp. Allow it to dry completely before proceeding.
- Assemble the lamp by attaching the cut pieces together using wood screws or nails. Ensure that the base is sturdy enough to support the lamp’s height and weight.
- If you’re creating a multi-level lamp, secure each layer with additional screws for stability.
- Once the main structure is complete, install the lamp kit. Follow the instructions that come with your lamp kit to attach the socket and cord securely to the lamp body. Make sure the electrical components are safely positioned and insulated to prevent any hazards.
- After installing the lamp kit, add the lampshade to the top of the socket. Choose a shade that matches your style and complements the overall design of the lamp. If you want to get creative, consider making your own lampshade using fabric or paper that fits your aesthetic.
- Place your completed floor lamp in your desired location. Turn it on to ensure everything is working correctly and enjoy the ambiance it brings to your space.
With this unique and personalized touch, your new pallet floor lamp will brighten your room while showcasing your DIY skills and creativity.
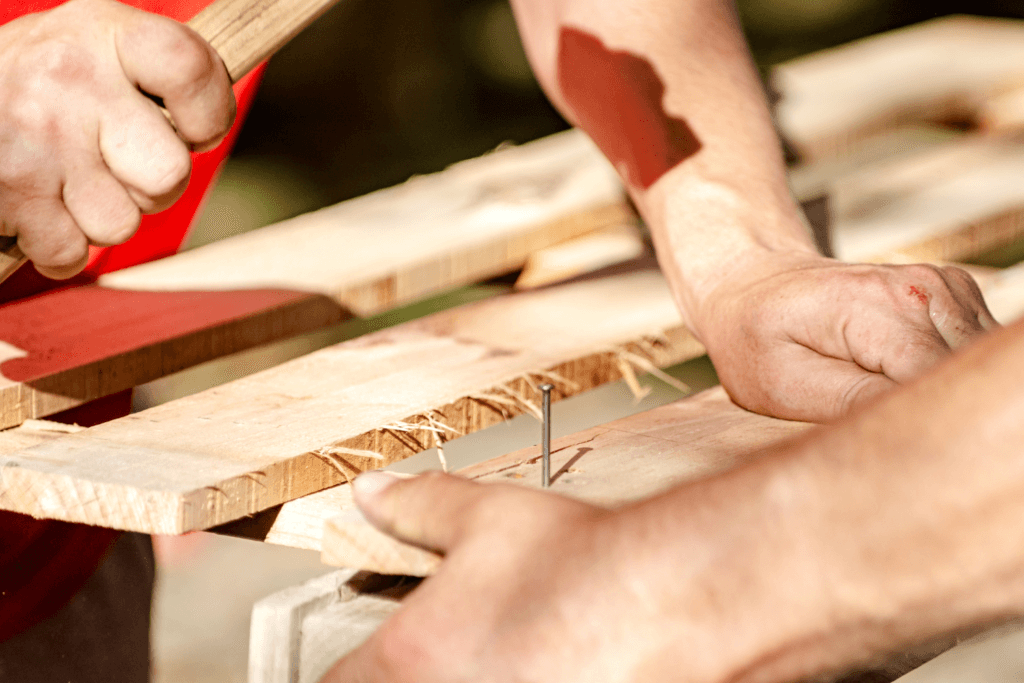
34. Wall Sconces
Gather your materials such as a pallet, a saw, sandpaper, wood screws or nails, a lamp kit (including a socket, cord, and bulb), and optional paint or wood stain for finishing.
- Decide on the design and dimensions of your wall sconces. You can choose a simple rectangular shape or get creative with more intricate designs.
- Once you have your design, use a saw to cut the pallet into the necessary pieces. For a basic wall sconce, you might need a rectangular piece for the backplate, a shelf for the bulb holder, and side supports if desired. Ensure the backplate is large enough to anchor securely to the wall.
- After cutting the wood, sand all surfaces thoroughly to remove any rough edges or splinters.
- If you want to enhance the appearance of the sconce, apply a coat of paint or wood stain. Choose a finish that complements your home decor and allow it to dry completely.
- Attach the backplate to the wall (using appropriate wall anchors if needed). Then, attach the shelf for the bulb holder and secure it firmly with wood screws or nails.
- If your design includes side supports, make sure they are securely fastened to both the backplate and shelf for stability.
- Install the lamp kit. Follow the instructions that come with your lamp kit to attach the socket and cord to the sconce. If you are not comfortable with electrical work, consult a professional.
- After installing the lamp kit, add the bulb to the socket. You can choose a decorative bulb to enhance the aesthetic of the sconce. You can also add a lampshade that matches your style to soften the light and add a more finished look.
- Turn on the sconce to ensure it works correctly and adjust its placement as needed.
Whether you install it in the hallway, bedroom, or living room, this unique lighting fixture will enhance your home’s ambiance.
Miscellaneous
From coat racks to mail organizers, pallets offer endless possibilities for miscellaneous DIY projects due to their adaptability and ease of modification.
35. Coat Racks
To get started, you need a sturdy pallet, a saw, sandpaper, wood screws or nails, hooks or knobs for hanging items, and optional paint or wood stain for finishing.
- Sketch a design that incorporates your desired number of hooks or knobs, considering how many coats or accessories you want to hang.
- Cut the pallet into the necessary pieces using a saw.
- After cutting the wood, sand all surfaces thoroughly to remove any rough edges or splinters.
- If desired, apply a coat of paint or wood stain to enhance the appearance of the coat rack. Choose a finish that complements your home decor, and allow it to dry completely before proceeding.
- Decide where to place the hooks or knobs on the coat rack. Using a measuring tape, mark the spots evenly along the length of the rack.
- Attach the hooks or knobs securely with screws. You can choose decorative hooks for added style, which can enhance the overall look of your coat rack.
- Once the hooks are attached, mount the coat rack on the wall. Use a level to ensure it is straight, and mark the location of the mounting points. You may need to use wall anchors or screws to secure it firmly. Drill holes in the wall as necessary and attach the coat rack using the screws.
- After mounting the coat rack, check that all hooks are secure and that the rack is sturdy.
- If you want to add a personal touch, consider attaching a small sign or label above the coat rack to indicate its purpose. This could be something as simple as “Welcome” to add character.
Building a coat rack from pallets is a practical and stylish DIY project that can help organize your entryway while adding a rustic touch to your home.
36. Shoe Storage
To get started, gather one or two pallets, a saw, sandpaper, wood screws or nails, and optional paint or wood stain for finishing. Follow this process:
- Determine the size and design of your shoe storage. Consider how many pairs of shoes you want to store and whether you prefer an open design for easy access or a more enclosed style.
- Once you have your design, use a saw to cut the pallets into the necessary pieces. Ensure that the pieces are cut evenly to maintain a balanced structure.
- After cutting the wood, sand all surfaces thoroughly to remove any rough edges or splinters.
- Apply a coat of paint or wood stain to enhance the look of your shoe rack. Choose a finish that complements your decor and allows it to blend seamlessly with your home.
- Assemble the shoe storage unit. Start by attaching the base pallet securely to the wall or floor to ensure stability. Then, attach the shelves or slats to create different levels for storing shoes.
- If you want to customize your shoe storage further, consider adding dividers or compartments within the shelves. This keeps pairs of shoes together and prevents them from toppling over.
- Check that all parts are secure and that the unit is stable. You can add labels or small signs to indicate where different types of shoes are stored, helping you maintain organization.
- You can add hooks on the sides or top for additional storage of accessories like shoe horns or brushes.
This DIY pallet project allows you to repurpose wooden pallets into a practical storage unit that can fit various shoe sizes and styles.
37. Mail Organizers
The materials needed are a pallet, a saw, sandpaper, wood screws or nails, and optional paint or wood stain for finishing. Here is what to do:
- Sketch a design that includes slots for organizing letters, a small shelf for miscellaneous items, and hooks for keys or other accessories if desired.
- Use a saw to cut the pallet into the necessary pieces. For a basic mail organizer, you need a backboard, a bottom shelf, and vertical dividers for the mail slots. If you want to add hooks, cut additional pieces for the bottom edge where the hooks will be attached.
- After cutting the wood, sand all surfaces thoroughly to remove any rough edges or splinters.
- Apply a coat of paint or wood stain to enhance the appearance of the organizer. Allow it to dry completely before proceeding.
- Attach the backboard to the wall using screws or wall anchors to ensure it is securely mounted. Then, attach the bottom shelf for added functionality.
- Use wood screws or nails to secure the vertical dividers into place, creating separate slots for your mail. Ensure that these slots are wide enough to accommodate standard-sized envelopes.
- If you want to include hooks for keys or other items, attach them to the bottom edge of the organizer. Mark the placement of the hooks evenly and secure them with screws.
- Check that all parts are secure and that it is firmly attached to the wall. You can personalize your organizer further by adding decorative elements.
Enjoy your DIY mail organizer, which keeps your mail organized and within reach.
Conclusion
DIY projects can be therapeutic, reducing stress and enhancing mental well-being by allowing individuals to engage in mindful, intentional activities.
These projects also promote sustainability by encouraging the reuse of materials, contributing to a more environmentally conscious lifestyle.
If you want to know where you can find free pallets near you that you can use for your DIY pallet projects, click here.
Chesapeake Pallets has been helping companies across the United States level up their logistics, one pallet at a time.
For inquiries, email info@chesapeakepallets.com or request a quote below!

